Listen to the sound of a structural failure. It is the tragic, wet "thud" of a breading shroud detaching from its protein anchor. This is the nightmare of the amateur cook, but for the culinary architect, it is a solvable engineering crisis. We are here to discuss the structural integrity of Chicken Parmesan Layers. To master this dish, you must treat the kitchen as a high-stakes construction site where the moisture barrier is the most critical asset. Imagine the piquant aroma of bubbling marinara meeting the sharp, salty crunch of aged cheese. The goal is a vertical stack of textures: a succulent, tenderized chicken core, a crisp golden-brown shell, and a viscous layer of molten mozzarella that refuses to compromise the crunch beneath. We are not just cooking; we are managing the thermodynamics of protein and starch. If you want a soggy, limp cutlet, go to a cafeteria. If you want a masterpiece of infrastructure that defies the laws of sogginess, you follow the protocol.
THE DATA MATRIX
| Metric | Specification |
|---|---|
| Prep Time | 30 Minutes |
| Execution Time | 25 Minutes |
| Yield | 4 Servings |
| Complexity | 7/10 |
| Estimated Cost per Serving | $4.50 – $6.00 |
THE GATHERS
Ingredient Protocol:
- Protein: 2 Large Chicken Breasts (approx. 500g / 1.1 lbs), butterflied and pounded.
- Adhesion Layer: 125g / 1 cup All-purpose flour, seasoned with 5g / 1 tsp sea salt.
- The Binding Agent: 2 Large Eggs (approx. 100ml), beaten with 15ml / 1 tbsp water.
- The Armor: 200g / 2 cups Panko breadcrumbs mixed with 50g / 0.5 cup grated Parmesan.
- The Lubricant: 120ml / 0.5 cup Neutral high-smoke point oil (Grapeseed or Avocado).
- The Sauce: 500ml / 2 cups San Marzano marinara, reduced until thick.
- The Sealant: 250g / 9 oz Fresh mozzarella, sliced and patted dry.
- The Garnish: 15g / 0.25 cup Fresh basil, chiffonade.
Section A: Ingredient Quality Audit:
If your chicken feels "woody" or rubbery, you are likely dealing with rapid-growth commercial poultry. To fix this, use a biological tenderizer like a light brine or a 20-minute yogurt soak to break down tough proteins. If your breadcrumbs are stale, do not attempt to salvage them; they will absorb oil like a sponge and ruin the crunch. Instead, aerate fresh bread in a low-temperature oven until brittle. If your mozzarella is releasing too much water (whey), it will destroy your Chicken Parmesan Layers. The fix is simple: slice the cheese thirty minutes early and sandwich it between heavy paper towels to extract excess moisture before it hits the broiler.
THE MASTERCLASS
1. The Architectural Foundation: Pounding and Priming
Begin by placing your butterflied chicken between sheets of plastic wrap. Use a heavy meat mallet or the flat side of a bench scraper to pound the protein to a uniform thickness of 1.25cm (0.5 inch). Consistency is the enemy of raw spots.
Pro Tip: Uniformity ensures that the Maillard reaction occurs simultaneously across the entire surface. If one side is thicker, the thin side will overcook and turn into leather before the center reaches safety. Use a digital scale to ensure each portion is weighted equally for consistent heat distribution.
2. The Triple-Stage Adhesion Sequence
Set up three shallow bins. First, dredge the chicken in flour, shaking off every gram of excess. Second, dip into the egg wash. Third, press firmly into the Panko-Parmesan mixture.
Pro Tip: This creates a protein-starch matrix. The flour absorbs surface moisture, the egg acts as a biological glue, and the Panko provides the structural scaffolding. Use your "dry hand" for the flour and "wet hand" for the egg to avoid "club hand" buildup on your fingers.
3. The Thermal Sear: Managing the Render
Heat your oil in a heavy-bottomed stainless steel saucier or cast-iron skillet until it reaches 175C (350F). Lay the chicken away from you to avoid splashes. Fry for 3 to 4 minutes per side until the crust is a deep, architectural bronze.
Pro Tip: Do not crowd the pan. Adding too much cold protein at once will drop the oil temperature, causing the breading to absorb oil rather than sear. This results in a greasy failure rather than a crisp barrier. Use an infrared thermometer to monitor the surface tension of the oil.
4. The Layering Protocol: Moisture Management
Transfer the fried cutlets to a wire rack set over a baking sheet. This allows air to circulate underneath, preventing steam from softening the bottom crust. Top with a minimal amount of concentrated marinara, then the prepared mozzarella.
Pro Tip: Placement is everything. By keeping the sauce localized to the center of the cutlet, you preserve the "crunch perimeter." This ensures the Chicken Parmesan Layers maintain their structural integrity even after the cheese has melted.
5. The Broiler Finish: Emulsification and Melt
Place the tray under a high broiler for 2 to 3 minutes. Watch for the cheese to blister and brown in spots, indicating that the fats are beginning to render and the proteins are tightening.
Pro Tip: Use a long-handled offset spatula to remove the cutlets. This tool allows you to support the entire base of the chicken without cracking the delicate breading "exoskeleton" you have worked so hard to build.
Section B: Prep & Timing Fault-Lines:
The most common human error is the "holding pattern." If you fry the chicken and let it sit for twenty minutes before adding sauce, the internal steam will migrate outward, turning your crispy crust into mush. If your oil is too hot, the breading will burn before the chicken reaches an internal temperature of 74C (165F). Always use a digital probe thermometer. If you find yourself behind schedule, keep the fried cutlets in a 95C (200F) oven on a rack; never stack them, as stacking creates a localized humidity chamber that kills texture.
THE VISUAL SPECTRUM
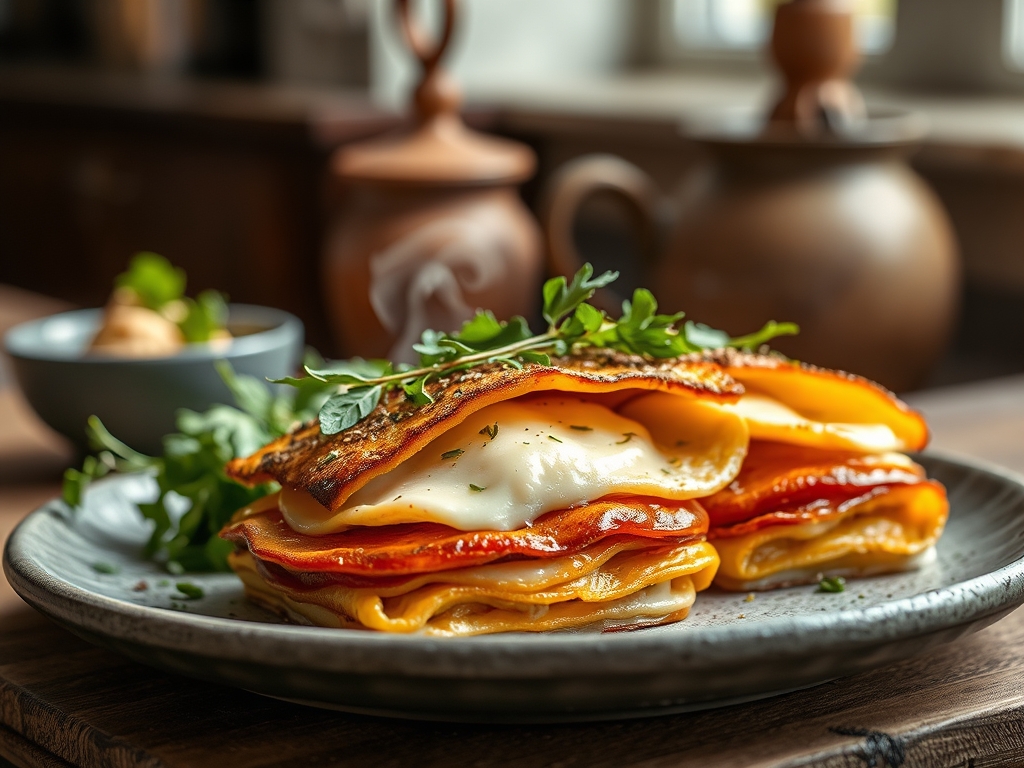
Section C: Thermal & Visual Troubleshooting:
Look at the reference photo above. Notice the "Golden Ratio" of browning; the edges of the chicken should be several shades darker than the center. If your dish looks pale, your oil temperature was too low, or you failed to infuse the breading with enough fat. If the cheese looks like a flat white sheet rather than a bubbly, translucent landscape, you pulled it from the heat too early. The "leopard spotting" on the mozzarella is a visual cue that the sugars have caramelized. If the sauce is bleeding red liquid across the plate, you did not reduce it enough in the saucier. A perfect Chicken Parmesan Layer should stand tall, with the sauce clinging to the meat rather than running away from it.
THE DEEP DIVE
Macro Nutrition Profile:
A standard serving contains approximately 650 calories, 45g of protein, 35g of carbohydrates, and 28g of fat. To optimize this, ensure you are using high-quality fats that do not oxidize at high temperatures.
Dietary Swaps:
- Keto: Replace flour with coconut flour and Panko with crushed pork rinds.
- Vegan: Use a breaded eggplant base, a flax-seed "egg" wash, and cashew-based mozzarella.
- GF: Utilize almond flour and certified gluten-free Panko. The structural principles remain identical.
Meal Prep & Reheating Science:
To maintain the molecular structure when reheating, avoid the microwave at all costs. The microwave agitates water molecules, causing them to explode through the breading, resulting in total structural collapse. Instead, use an air fryer or a toaster oven at 190C (375F). This re-crisps the exterior while gently warming the interior, effectively "re-setting" the moisture barrier.
THE KITCHEN TABLE
Why does my breading fall off the chicken?
Usually, the chicken was too wet before the flour stage. Pat the meat bone-dry with paper towels. If the protein is damp, the flour turns into a slick paste that slides off during the frying process.
Can I bake the chicken instead of frying?
You can, but you will sacrifice the Maillard-induced flavor profile. If you must bake, pre-toast your Panko in a pan with a little oil before breading to ensure you achieve that essential golden hue and crunch.
What is the best cheese for the perfect pull?
Low-moisture mozzarella is the industry standard for a reason. It has the ideal protein-to-fat ratio for melting without releasing a lake of water. Mix in a little Provolone for a sharper, more piquant flavor profile.
How do I keep the bottom from getting soggy?
The wire rack is your best friend. Never place a hot, fried cutlet directly onto a flat plate or a solid baking sheet. The trapped steam has nowhere to go but back into the crust. Space is the secret.