Listen to that sound. It is the violent, rhythmic crackle of moisture escaping a protein lattice at three hundred and fifty degrees Fahrenheit. If you have ever experienced the heartbreak of a golden crust sliding off a piece of poultry like a cheap suit, you have failed the laws of thermodynamics. We are not just cooking; we are engineering a structural bond. Fried Chicken Battering is the high-stakes architecture of the culinary world. It requires a perfect understanding of protein denaturization and starch gelatinization. We are looking for a shatter-proof seal that fuses the seasoned flour to the integument of the bird. Without proper adhesion, you are just serving wet meat inside a greasy sleeping bag. To achieve the legendary "crust-to-meat" integrity, we must manipulate surface tension and moisture migration with surgical precision. This is where the amateur stops guessing and the professional starts measuring. Grab your digital scale and clear your station. We are about to turn humble poultry into a structural masterpiece of crunch, salt, and heat.
THE DATA MATRIX
| Metric | Specification |
|---|---|
| Prep Time | 45 Minutes (Active) |
| Execution Time | 20 Minutes |
| Yield | 4 Servings |
| Complexity (1-10) | 7 |
| Estimated Cost per Serving | $4.50 |
THE GATHERS
Ingredient Protocol:
- 1.4kg / 3lbs Bone-in, skin-on chicken thighs
- 500ml / 2 cups Cultured buttermilk
- 500g / 4 cups All-purpose flour
- 120g / 1 cup Cornstarch (for amylose density)
- 30ml / 2 tbsp Hot sauce (vinegar-based)
- 15g / 1 tbsp Kosher salt
- 10g / 2 tsp Smoked paprika
- 5g / 1 tsp Monosodium Glutamate (MSG)
- 2L / 8 cups High-smoke point oil (Peanut or Grapeseed)
Section A: Ingredient Quality Audit:
The primary failure point in Fried Chicken Battering is often the flour itself. If your flour has high moisture content from a humid pantry, it will clump prematurely and create a doughy interface. Solution: Aerate your dry mix with a fine-mesh sieve to ensure a uniform particle distribution. If your buttermilk lacks the necessary viscous cling, it is likely too cold or under-acidified. Whisk in a teaspoon of lemon juice to tighten the proteins. Finally, ensure your chicken is not "enhanced" with a saline solution from the factory. Excess internal water will steam the crust from the inside out, destroying your adhesion. Always pat the protein bone-dry before the initial dredge.
THE MASTERCLASS
Step 1: The Acidic Brine
Submerge the poultry in the buttermilk and hot sauce mixture for at least four hours. The lactic acid works to break down tough connective tissues while the salt penetrates the deep muscle fibers. Use a stainless steel saucier or a non-reactive bowl to prevent metallic off-flavors.
Pro Tip: This stage is about more than flavor. The buttermilk creates a protein-rich primer that helps the flour particles anchor to the skin. This is the "glue" layer of your structural build.
Step 2: The Amylose Fortification
In a large hotel pan or shallow dish, whisk the flour, cornstarch, and spices. The cornstarch is vital because it lacks gluten; it provides a brittle, glass-like crunch that wheat flour alone cannot achieve. Use a digital scale to ensure the ratio is exactly 4:1 flour to starch.
Pro Tip: Adding a few tablespoons of the liquid marinade into the dry flour creates "crags." These small, hydrated clumps attach to the chicken and increase the surface area for maximum crunch.
Step 3: The Double-Dredge Manifold
Remove the chicken from the brine, let the excess drip off, and bury it in the flour. Press down firmly with the heel of your hand to force the starch into every crevice. Shake off the excess and place the chicken on a wire rack.
Pro Tip: Use a bench scraper to keep your station clean between batches. Pressing the flour creates a "mortar" effect that prevents the crust from flaking off during the violent bubbling of the fry.
Step 4: The Cure Period
Do not fry immediately. Let the breaded chicken rest on a wire rack for fifteen minutes. This allows the flour to hydrate and form a cohesive skin. If you skip this, the dry flour will hit the oil and immediately disperse, leaving bald spots on the bird.
Pro Tip: This rest period allows the gluten in the flour to relax, preventing the crust from shrinking and pulling away from the meat as it hits the heat.
Step 5: Thermal Immersion
Heat your oil to 350 degrees Fahrenheit. Carefully lower the chicken away from your body to avoid splashes. Do not overcrowd the pot; this causes the temperature to plummet, leading to oil absorption and a greasy, heavy crust.
Pro Tip: Use an infrared thermometer to monitor surface temps. Maintaining a consistent heat ensures the Maillard reaction occurs rapidly, sealing the exterior before the interior dries out.
Section B: Prep & Timing Fault-Lines:
Timing is the silent killer of the perfect fry. If you leave the chicken in the flour too long before the rest period, the coating becomes gummy. If the oil is too hot (above 375F), the exterior will render and burn before the internal temperature reaches the safe zone of 165F. Use a probe thermometer to verify the thickest part of the thigh. If you notice the crust darkening too quickly, reduce the flame and finish the bird in a 300F oven to ensure even cooking without carbonizing the spices.
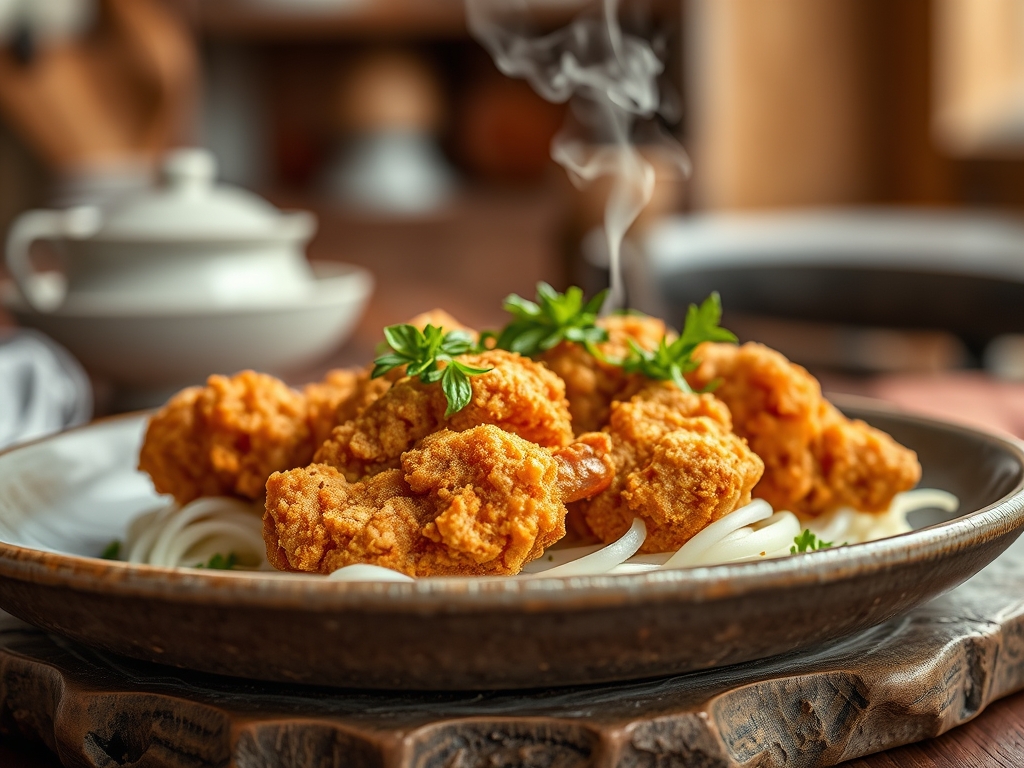
THE VISUAL SPECTRUM
Section C: Thermal & Visual Troubleshooting:
Referencing the Masterclass photo, you should see a variegated landscape of deep gold and amber. If your chicken looks pale and "dusty," your oil temperature was too low, or you didn't allow the flour to hydrate properly during the rest phase. If the crust is falling off in large sheets, you likely had too much moisture on the skin before the first dredge. The ideal visual cue is a "knobby" texture; these are the hydrated flour clumps we created in Step 2. They should appear shattered and crisp, not smooth. Dull, matte colors indicate old oil that has broken down; always use fresh, filtered oil for the brightest piquant presentation.
THE DEEP DIVE
Macro Nutrition Profile:
A standard serving (two thighs) contains approximately 620 calories, 38g of protein, 42g of carbohydrates, and 34g of fat. The high protein content is offset by the caloric density of the starch and oil.
Dietary Swaps:
- Keto: Replace flour and cornstarch with a 50/50 mix of crushed pork rinds and parmesan cheese. Use an egg wash instead of buttermilk.
- Gluten-Free: Substitute the all-purpose flour with a high-quality 1:1 GF blend (usually rice flour based) and double the cornstarch for extra structural integrity.
- Vegan: Use cauliflower florets or oyster mushrooms. Replace buttermilk with soy milk curdled with apple cider vinegar.
Meal Prep & Reheating Science:
To maintain molecular structure when reheating, avoid the microwave at all costs. The microwave excites water molecules, which steam the crust from within and turn it into mush. Instead, use an air fryer or oven at 375F for 8 minutes. This re-activates the fats in the crust, essentially "re-frying" the exterior while keeping the meat succulent.
THE KITCHEN TABLE
Why is my chicken crust soggy?
Sogginess is caused by steam trapped between the meat and the coating. Ensure you rest the chicken on a wire rack after frying, not on paper towels, which trap moisture and kill the crunch.
Can I use milk instead of buttermilk?
Plain milk lacks the acidity to tenderize the meat and the thickness to hold the flour. If you must use milk, add a tablespoon of white vinegar and let it sit for ten minutes to curdle.
What is the best oil for frying?
Peanut oil is the gold standard due to its high smoke point and neutral flavor profile. If allergies are a concern, grapeseed or refined canola oil are excellent, stable alternatives for high-heat applications.
How do I get those extra crunchy bits?
Drizzle a few spoonfuls of your buttermilk marinade into your dry flour mix and toss with a fork before dredging. These "fines" create the jagged, ultra-crisp texture found in professional kitchens.