Listen up, kitchen operatives. We are moving beyond the realm of hobbyist baking and entering the high-stakes theater of microbial engineering. If you think sourdough is just flour and water, you are already behind the curve. We are managing a living, breathing colony of Saccharomyces exiguus and Lactobacillus, a biological infrastructure that demands precision, timing, and a ruthless eye for detail. This is not a recipe; it is a full-scale Sourdough Bread Audit. We are looking for that elusive, shattered-glass crust and a crumb structure so aerated it defies the laws of gluten tension. When you pull that boule from the oven, the crackle should sound like a round of applause from the gods of fermentation. If your starter is sluggish or your hydration levels are a guessing game, your bread will be a dense, gummy monument to your own negligence. We are here to optimize the kinetics of wild yeast, ensuring every air pocket is a testament to your technical mastery. Gear up; we are about to audit your oven performance.
THE DATA MATRIX
| Metric | Specification |
|---|---|
| Prep Time | 30 Minutes Active |
| Execution Time | 24 to 36 Hours |
| Yield | 2 Standard Boules |
| Complexity (1-10) | 8 |
| Estimated Cost per Serving | $0.45 |
THE GATHERS
Ingredient Protocol:
- 800g / 6.25 cups Strong Bread Flour (12.7 percent protein minimum)
- 100g / 0.75 cups Whole Rye Flour
- 680ml / 2.85 cups Filtered Water (Heated to 90 degrees Fahrenheit)
- 180g / 0.75 cups Active Liquid Starter (100 percent hydration)
- 20g / 1.25 tablespoons Fine Sea Salt
- 50ml / 0.2 cups Additional Water (For salt incorporation)
Section A: Ingredient Quality Audit:
The primary failure point in a Sourdough Bread Audit is often the enzymatic activity of the flour. If you are using bleached all-purpose flour, you are essentially starving your microbes; the bleaching process strips away the nutrients required for a robust fermentation cycle. Switch to unbleached, stone-ground flour to ensure a diverse mineral profile. If your water is heavily chlorinated, it will act as an antimicrobial agent, effectively stalling your yeast population. The fix is simple: use filtered water or let tap water sit uncovered for 24 hours to allow the chlorine to dissipate. Finally, if your starter does not pass the "float test" in a saucier or glass bowl, do not proceed. A sunken starter indicates insufficient CO2 production, which will result in a heavy, brick-like loaf.
THE MASTERCLASS
1. The Autolyse Phase
Combine your flours and the initial 680ml of water in a large ceramic bowl. Mix until no dry flour remains and let it rest for one hour. This allows the flour to fully hydrate and initiates the protease enzymes which begin breaking down proteins for better extensibility.
Pro Tip: Use a digital scale for this step. Volumetric measurements are the enemy of consistency in high-hydration baking; a 5 percent variance in water can ruin your crumb structure.
2. Inoculation and Salt Integration
Dimple your active starter and the salt into the dough using your fingertips. Add the remaining 50ml of water to help the salt dissolve. Use the "Rubaud Method" to scoop and flip the dough, incorporating oxygen to aerate the mixture and strengthen the early gluten bonds.
Pro Tip: Keep a small bowl of water nearby to dip your hands in. Wet hands prevent the viscous dough from sticking to your skin, allowing for cleaner movements.
3. Bulk Fermentation and Folds
Over the next four hours, perform four sets of "stretch and folds" every 30 minutes. Reach under the dough, pull it upward until you feel resistance, and fold it over itself. This builds the structural integrity needed to trap the gases produced by the yeast.
Pro Tip: Use a bench scraper to keep your workspace clean and to help lift the dough without tearing the delicate gluten cloak you are building.
4. The Pre-Shape and Bench Rest
Gently tip the dough onto a lightly floured surface. Divide it into two equal portions. Use your hands to tension the dough into a rough ball. Let it rest for 30 minutes uncovered. This allows the gluten to relax before the final shaping.
Pro Tip: If the dough spreads aggressively like a pancake, your gluten development was insufficient. Perform an extra set of folds next time to render a tighter internal matrix.
5. Final Shaping and Cold Proof
Shape the dough into a tight boule or batard by creating surface tension. Place the dough upside down into a floured banneton. Cover and refrigerate for 12 to 24 hours. This cold retard slows down the yeast but allows the lactic acid bacteria to create a piquant, complex flavor profile.
Pro Tip: Dust your proofing baskets with rice flour. Unlike wheat flour, rice flour does not contain gluten and will not stick to the dough, ensuring a clean release.
6. The Scored Bake
Preheat a Dutch oven to 500 degrees Fahrenheit. Carefully transfer the cold dough into the pot. Use a sharp lame or razor blade to score the surface at a 45-degree angle. Bake covered for 20 minutes, then uncovered for 25 minutes at 450 degrees.
Pro Tip: The steam trapped inside the Dutch oven is what allows for maximum oven spring. It keeps the crust soft longer, allowing the internal gases to expand fully before the crust sets.
Section B: Prep & Timing Fault-Lines:
The most common human error is misjudging the "bulk fermentation" end point. Ambient kitchen temperature dictates the speed of your microbes. If your kitchen is 65 degrees, your bulk might take eight hours; if it is 80 degrees, it might take three. Do not watch the clock; watch the dough. You are looking for a 30 to 50 percent increase in volume and the presence of small bubbles on the surface. If you over-proof, the gluten structure will collapse, leading to a flat loaf. If you under-proof, you will get "tunneling" where large, uneven holes appear in a dense crumb.
THE VISUAL SPECTRUM
Section C: Thermal & Visual Troubleshooting:
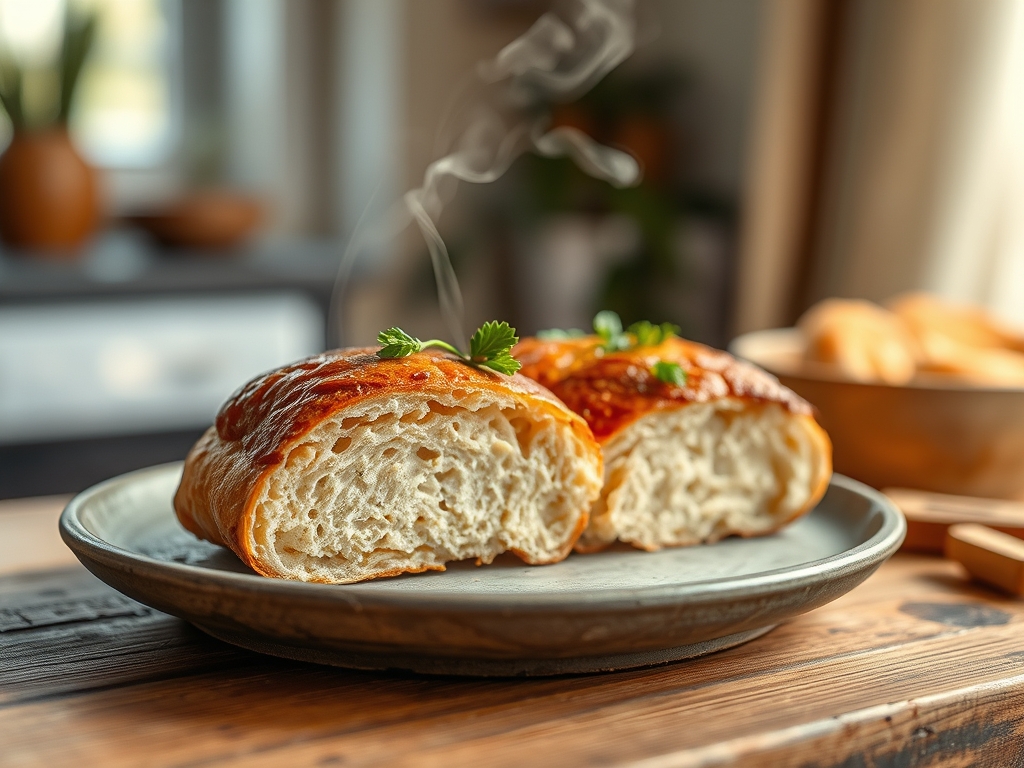
Referencing the Masterclass photo, notice the deep, mahogany color of the crust; this is the result of the Maillard reaction and sugar caramelization. If your loaf is pale, your oven temperature was too low or you over-proofed the dough, leaving no residual sugars for browning. If the "ear" (the raised flap of crust where you scored) is non-existent, your scoring was too shallow or your blade was dull. A dull blade drags the dough rather than slicing it. If the bottom of the loaf is burnt while the top is perfect, place a cookie sheet on the rack below your Dutch oven to deflect the direct radiant heat from the bottom element.
THE DEEP DIVE
Macro Nutrition Profile
Sourdough is a nutritional powerhouse compared to commercial bread. The long fermentation process breaks down much of the phytic acid, making minerals like magnesium and zinc more bioavailable. A standard slice contains approximately 180 calories, 7g of protein, and 36g of complex carbohydrates. The low glycemic index ensures a slower glucose release into the bloodstream.
Dietary Swaps
- Vegan: Sourdough is naturally vegan. To enhance the crust, you can mist the dough with water before baking.
- Keto: True sourdough is high-carb. For a keto-adjacent version, replace 30 percent of the flour with vital wheat gluten and flax meal, though the microbial kinetics will differ significantly.
- Gluten-Friendly: While not gluten-free, the long fermentation breaks down gluten proteins, making it easier to digest for those with mild sensitivities.
Meal Prep & Reheating Science
To maintain the molecular structure, never refrigerate finished bread; this accelerates staling through starch retrogradation. Store at room temperature in a paper bag for 48 hours. To reheat, mist the loaf with water and place it in a 350-degree oven for 10 minutes. This re-hydrates the starch molecules and restores the "shattered-glass" texture of the crust.
THE KITCHEN TABLE
Why is my sourdough starter liquid on top?
That liquid is "hooch," a byproduct of fermentation. It indicates your starter is hungry and has exhausted its food supply. Pour it off or stir it in, then feed your starter immediately to restore the microbial balance.
Can I bake sourdough without a Dutch oven?
Yes, but you must manually infuse the oven with steam. Place a lava-rock-filled tray at the bottom of the oven and pour boiling water into it as you load the bread. This mimics the Dutch oven environment.
How do I get larger holes in my crumb?
Increase your hydration levels and handle the dough gently during the shaping phase. Large holes, or "open crumb," are the result of high water content and minimal degassing of the carbon dioxide produced during bulk fermentation.
Why does my bread smell like vinegar?
Excessive acidity is usually caused by an over-extended fermentation or a starter that was too acidic. To fix this, shorten your room-temperature proofing time or perform more frequent starter feedings to dilute the acetic acid buildup.