The kitchen is a battlefield of thermodynamics where the stakes are written in carbon and sugar. You are not just cooking; you are conducting a high-stakes chemical intervention. When the heat hits the pan, we are looking for that precise moment of molecular transformation where raw poultry meets a high-viscosity lacquer. This is the art of the Chicken Teriyaki Glaze. It is a sensory assault of piquant ginger, sharp garlic, and the deep, fermented soul of soy sauce. We are chasing the Maillard reaction, that glorious browning of proteins, while simultaneously managing the caramelization of sugars to prevent a bitter, burnt catastrophe. If you do it right, the chicken emerges from the heat wearing a shimmering, mahogany suit of armor that clings to every crevice. If you do it wrong, you are left with a watery, grey mess or a scorched pan of carbonized regret. We do not accept mediocrity in this laboratory. We demand a glaze that is thick, glossy, and structurally sound enough to defy gravity.
THE DATA MATRIX
| Metric | Specification |
|---|---|
| Prep Time | 15 Minutes |
| Execution Time | 20 Minutes |
| Yield | 4 Servings |
| Complexity (1-10) | 4 |
| Estimated Cost per Serving | $3.50 USD |
THE GATHERS
Ingredient Protocol:
- 680g / 1.5 lbs Boneless Skinless Chicken Thighs (trimmed)
- 120ml / 0.5 cup Low-Sodium Soy Sauce
- 120ml / 0.5 cup Mirin (Japanese sweet rice wine)
- 50g / 0.25 cup Brown Sugar (packed)
- 15ml / 1 tbsp Fresh Ginger (grated)
- 3 Cloves Garlic (microplaned)
- 15ml / 1 tbsp Toasted Sesame Oil
- 10g / 1 tbsp Cornstarch
- 30ml / 2 tbsp Cold Water
- 5g / 1 tsp Toasted Sesame Seeds (for garnish)
- 2 Green Onions (thinly sliced on a bias)
Section A: Ingredient Quality Audit:
If your soy sauce tastes like liquid salt and nothing else, your glaze will lack the fermented depth required for a professional profile. Use a naturally brewed shoyu. If your ginger is fibrous and dry, do not try to chop it; use a microplane to create a paste that will infuse the liquid without leaving woody shards. If your chicken thighs have excessive moisture from "plumping" injections, pat them aggressively dry with paper towels. Excess surface moisture is the enemy of the sear; it creates steam, which prevents the Maillard reaction and leaves your chicken looking like it was boiled in a basement.
THE MASTERCLASS
Step-by-Step Execution:
1. The Protein Preparation
Trim the chicken thighs into uniform 1-inch pieces. Use a sharp chef knife to ensure clean cuts that do not tear the muscle fibers. Place the chicken in a bowl and toss with a small amount of neutral oil. This creates a conductive layer for heat transfer.
Pro Tip: Use a digital scale to ensure your chicken portions are consistent. Uniformity in size ensures that every piece reaches the safe internal temperature of 165F (74C) at the exact same moment; preventing the dreaded mix of overcooked rubber and undercooked danger.
2. The High-Heat Sear
Heat a heavy-bottomed stainless steel saucier or cast-iron skillet over medium-high heat. Once the pan is shimmering, add the chicken in a single layer. Do not crowd the pan. Let the chicken sit undisturbed for 3 to 4 minutes to develop a deep, golden-brown crust.
Pro Tip: Resist the urge to move the meat. This is a chemical process called "adhesion." The meat will naturally release from the pan once the surface proteins have sufficiently dehydrated and browned. Use a fish spatula or bench scraper to flip the pieces once they move freely.
3. The Aromatics Integration
Once the chicken is browned, reduce the heat to medium. Add the grated ginger and microplaned garlic. Stir constantly for 45 seconds until fragrant. You want to render the aromatic oils without scorching the delicate garlic solids.
Pro Tip: Garlic burns at a much lower temperature than chicken fat. By adding it after the initial sear, you protect the flavor profile from becoming acrid. Use a silicone spatula to scrape the "fond" (the brown bits) off the bottom of the pan as the aromatics release their moisture.
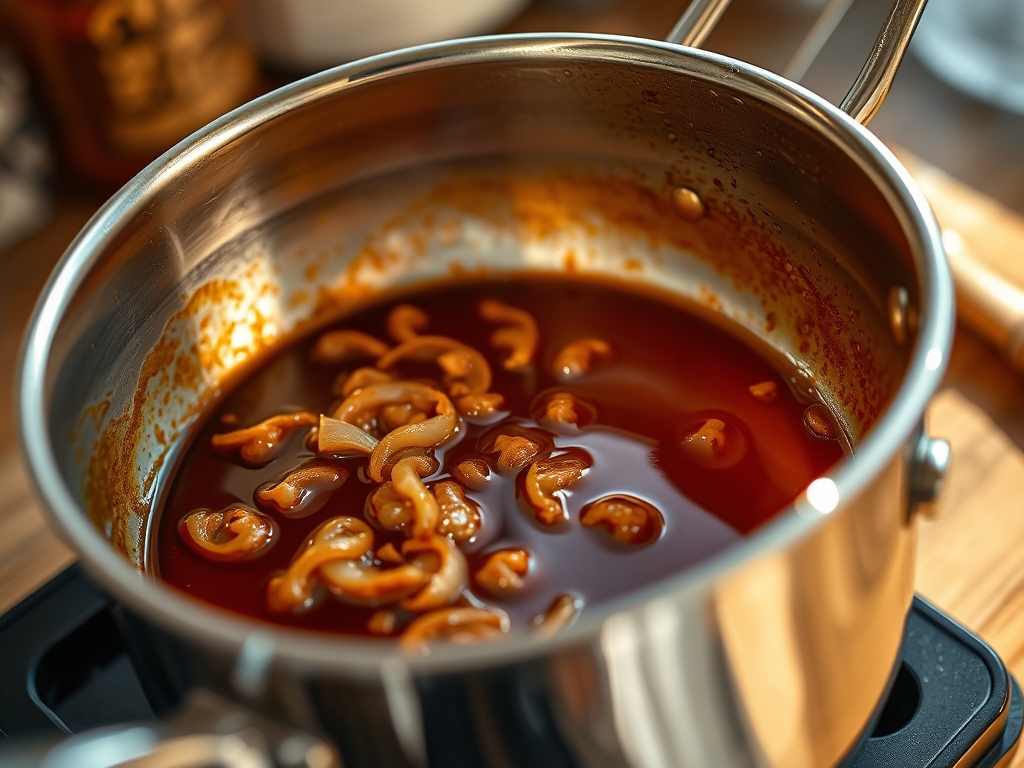
4. The Glaze Synthesis
Pour in the soy sauce, mirin, and brown sugar. Increase the heat slightly to bring the mixture to a simmer. Use your spatula to deglaze the pan, incorporating all those caramelized protein bits back into the liquid. This is where the soul of the Chicken Teriyaki Glaze is born.
Pro Tip: A saucier with rounded bottom edges is superior here; it allows your whisk or spatula to reach every millimeter of the pan, preventing sugar from crystallizing in the corners and burning.
5. The Slurry Stabilization
In a small ramekin, whisk the cornstarch and cold water until smooth. Slowly pour the slurry into the simmering pan while stirring constantly. The liquid will transition from translucent to opaque, and then to a brilliant, glossy sheen as the starches gelatinize.
Pro Tip: This is "starch hydration." If you add the powder directly to the hot pan, it will clump into "fish eyes." The cold water slurry ensures a smooth, viscous texture that coats the back of a spoon perfectly.
Section B: Prep & Timing Fault-Lines:
The most common failure in this protocol is "crowding the pan." If you dump all the chicken in at once, the pan temperature drops instantly. Instead of searing, the chicken leeches juice and begins to poach. If this happens, remove the chicken, drain the liquid into a bowl, wipe the pan, and start the sear again in batches. Another fault-line is the "sugar burn." If your heat is too high when you add the glaze, the sugar will bypass caramelization and go straight to carbonization. Keep a close eye on the bubbles; small, tight bubbles indicate the glaze is thickening, while large, erratic bubbles mean you are seconds away from a burnt pan.
THE VISUAL SPECTRUM
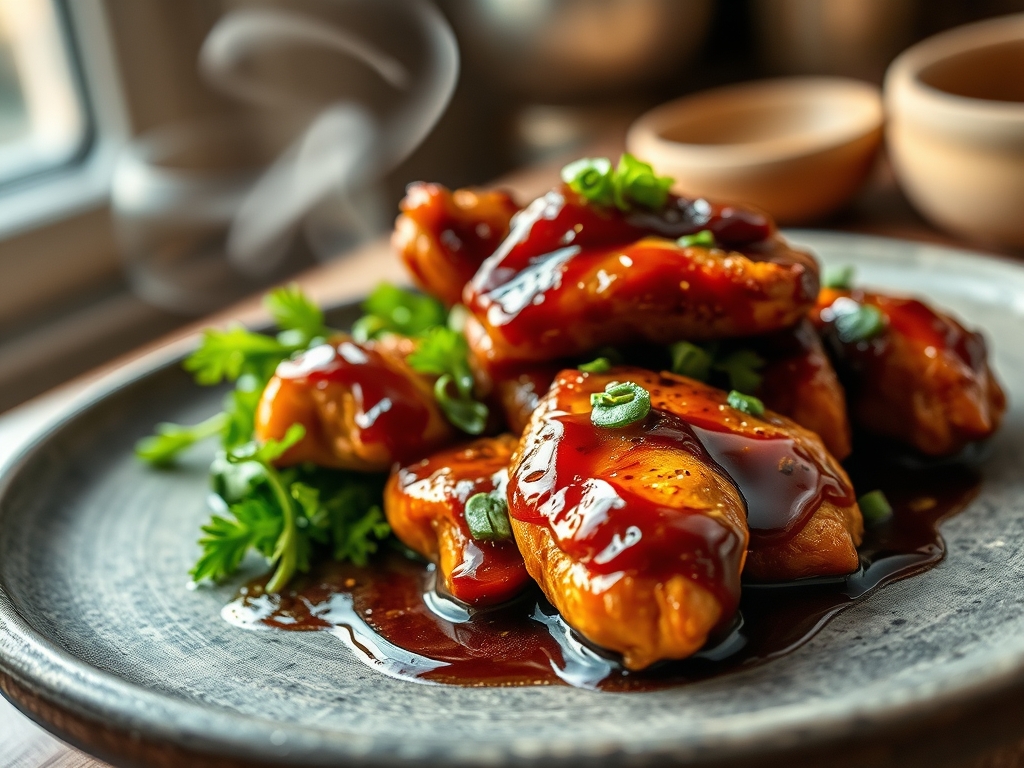
Section C: Thermal & Visual Troubleshooting:
Look at the Masterclass photo. Notice the "lacquered" effect. The chicken should not look wet; it should look coated. If your dish looks dull or grey, you likely skipped the high-heat sear or didn't allow the glaze to reduce enough. If the sauce is breaking and looks oily, you have overheated the fats; whisk in a teaspoon of water to re-emulsify the sauce. The visual cues of a perfect glaze are a deep mahogany color and a surface tension that allows the sauce to cling to the chicken rather than pooling at the bottom of the plate. If your sesame seeds are white, they are under-toasted; a quick 30-second dry toast in a pan will provide the golden hue seen in the reference image.
THE DEEP DIVE
Macro Nutrition Profile:
A standard serving of this Chicken Teriyaki Glaze protocol yields approximately 340 calories. This breaks down into 35g of protein, 12g of fat, and 22g of carbohydrates. The majority of the carbs come from the sugar and mirin, which are essential for the structural integrity of the glaze.
Dietary Swaps:
- Vegan: Replace chicken with extra-firm pressed tofu or seitan. Use a mushroom-based soy sauce for extra umami.
- Keto: Replace brown sugar with a monk fruit erythritol blend and use xanthan gum (0.25 tsp) instead of cornstarch.
- GF: Ensure you use Tamari instead of standard soy sauce, as most commercial soy sauces contain wheat.
Meal Prep & Reheating Science:
To maintain the molecular structure during reheating, avoid the microwave if possible. The microwave excites water molecules unevenly, which can turn your glossy glaze into a sticky, broken mess. Reheat in a skillet over medium-low heat with a tablespoon of water. This moisture will aerate the sauce and restore its original viscosity without overcooking the protein.
THE KITCHEN TABLE
Why is my glaze too thin?
You likely didn't allow the cornstarch slurry to reach a full simmer. Starch requires heat to "bloom" and thicken. Give it sixty seconds at a bubbling simmer to reach maximum structural density.
Can I use chicken breast instead?
Yes; however, breasts lack the fat and connective tissue of thighs. They dry out rapidly. Reduce your searing time by 20% and ensure you do not overcook them before adding the glaze components.
My sauce is too salty. Help!
This is usually caused by over-reduction or low-quality soy sauce. Add a splash of water and a squeeze of fresh lime juice. The acidity will cut through the sodium and balance the flavor profile instantly.
Why did my garlic turn blue?
This is a harmless chemical reaction between the sulfur in the garlic and the enzymes in the ginger or the acidity of the mirin. It usually happens with older garlic. It is perfectly safe to eat.
How do I get that "restaurant" shine?
The secret is a "monte au beurre" finish. Whisk in a single pat of cold, unsalted butter right before serving. The fat molecules create a microscopic film that reflects light, giving you that professional glow.